A full page gallery is a completely customizable shoppable Instagram gallery that you can put anywhere on your site. The idea behind is to show your customers all of your social content in one dedicated page.
Step 1:
In your Foursixty DASHBOARD go into the EMBED section. See the image below for reference.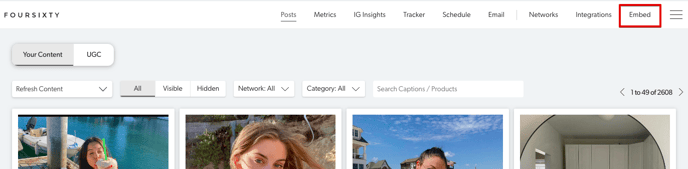
Step 2:
Next you need to "Pick Your Theme". Since you are creating a full page gallery you will need to choose between the Full page (Grid) or Full page (Collage) options. Click the icon to choose your preferred style. See the below image for reference.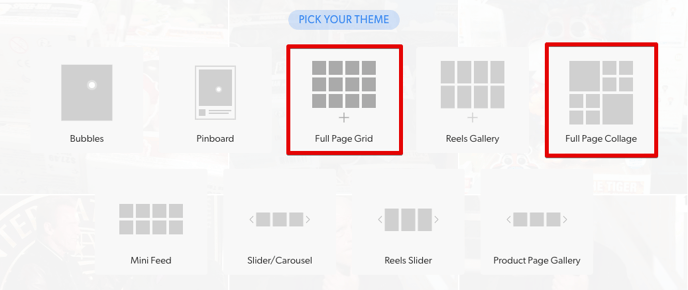
Step 3:
The next series of things will help you add some customization to your galleries. Select and customize the options as you wish then click the right arrow to move to the next step. You have the option to choose the following:
- Foreground: Lets you choose the color of the hover text (call to action).
- Background: Lets you choose the color of the overlay shadow.
- Post Spacing: Lets you choose the gap between images (note: we do not remove borders from images if they are posted as such on Instagram).
- Hover Margin: Lets you determine if you want the overlay shadow to cover the entire image.
- Integrate Okendo Reviews: If you have the Okendo app integrated and want to show the star rating in the pop-up, enable this option.
- Open Links In New Tab: Opens any links in a new tab, keeping the page with the gallery always open.
- Show Date: Lets you determine if you want to have the date of the image's posting to Instagram show up in the overlay hover. (This option is not present for Collage galleries.)
- Show Icon: Lets you decide to either show or not show the social media platform icon (Instagram icon, etc.) from where the image was imported from.
- Show Text: Lets you determine if you want to have a snippet of the post text show up in the overlay hover.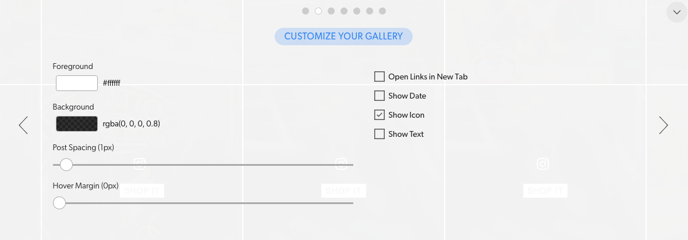
Step 4:
The next step includes customizing your Call To Action (what encourages potential Customers to find out more). Customize as fits to your brand then click the right arrow to move to the next step.
- Call To Action: This is what the text will say. "SHOP IT" is the default, but many customize this to better represent their brand. "SHOP ME" and "SHOP NOW" are the most common phrases used.
- Button Type: You can choose from several different options to display your CallTo Action:
* Button (box with a solid background)
* Border (box with no background and a solid border)
* Underline (No box but text is underlined)
* Just Text (no underline or box)
* None (No Call To Action displayed at all)
- Button Options: Shows if Button is chosen. Lets you determine the box size/padding around the text that you have chosen.
- Border Options: Shows if Border is chosen. Lets you determine the box size/padding around the text that you have chosen and the thickness of the solid border.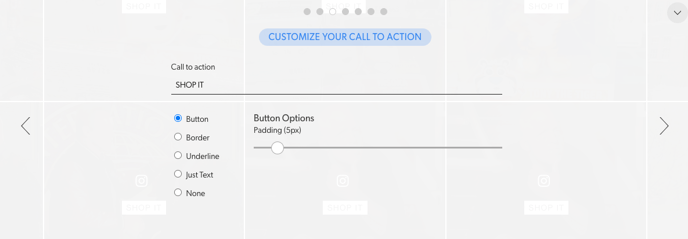
Step 5:
Now you are given the opportunity to override our default fonts. This is to help the galleries look more like a natural part of your site. Customize your fonts and styles then click the right arrow to move to the next step.
- Comment Text: This determines the font name(s), size, and style (bold or italic) that is used when Customers click the image and view the text from the Instagram post in the pop-up.
- Accent Text: This determines the font name(s), size, and style (bold or italic) that is used when Customers see your Call To Action text, plus the Instagram username and date within the pop-up.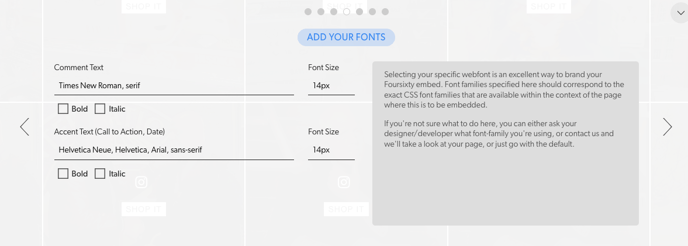
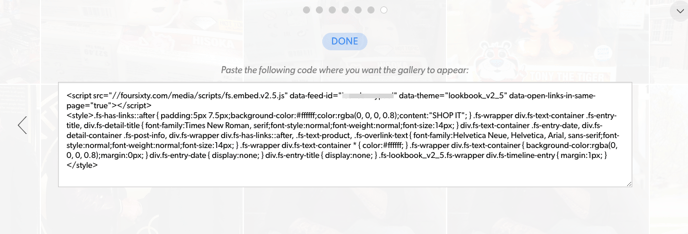
Step 6:
Once you are done with your customizations, you will now be brought to a page with your embeddable code that you can copy and paste into your site's existing code.