Once you organize your ambassador galleries, this article will walk you through how to create and customize an Ambassador Carousel + Collage gallery.
Step 1:
Click EMBED >>>Select Ambassador Carousel + Collage >>>Click forward button.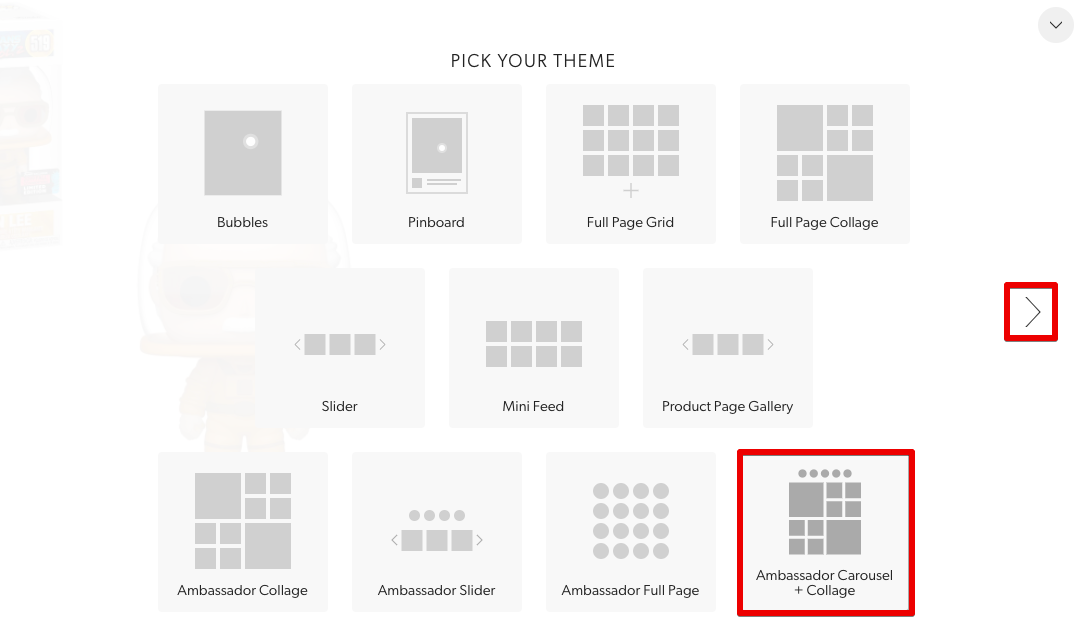
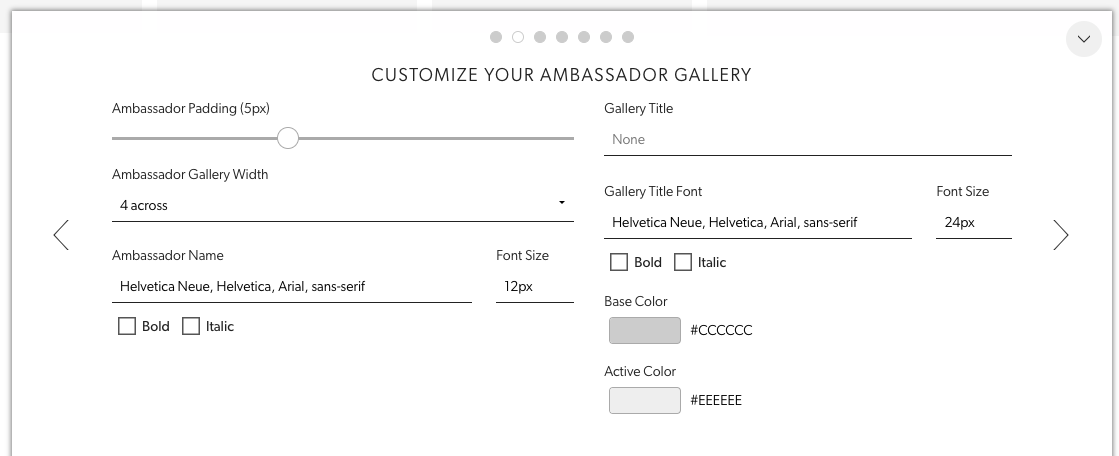
Step 2:
The next series of options will help you add some customization to your galleries. Select and customize the options as you wish, then click the right arrow to move to the next step. You have the option to choose the following:
- Ambassador Padding: Edit the gap between images (note: we do not remove borders from images if they are posted as such on Instagram).
- Ambassador Gallery Width: Edit the number of Ambassadors in each row.
- Ambassador Name: Edit the font of the Ambassador name in the collage.
- Gallery Title: Specify a name for the main gallery. (This is optional.)
- Font Size: Edit the font size of the Ambassador name.
- Base Color: Edit the base color ring around the Ambassador image in the next step.
- Active Color: Edit the color ring around the selected Ambassador image in the next step.
Step 3:
This allows you to change the look and feel of the next stage of the Ambassador Collage.
- Ambassador Name: Edit the font of the Ambassador name in the collage.
- Ambassador Bio: Edit the font of the Ambassador Bio or, if you wish to remove it from this stage, you can check off the box to do so.
- Hide Ambassador Bio: Allows you to hide the bio that you create for each Ambassador leaving only the Name visible to visitors.
- Back Button: Edit what you want the back button to say. Default is "View All", which will send you back to the original collage. You can simply name it "Back" if you wish.
- Back Button Font: Edit the Back Button font.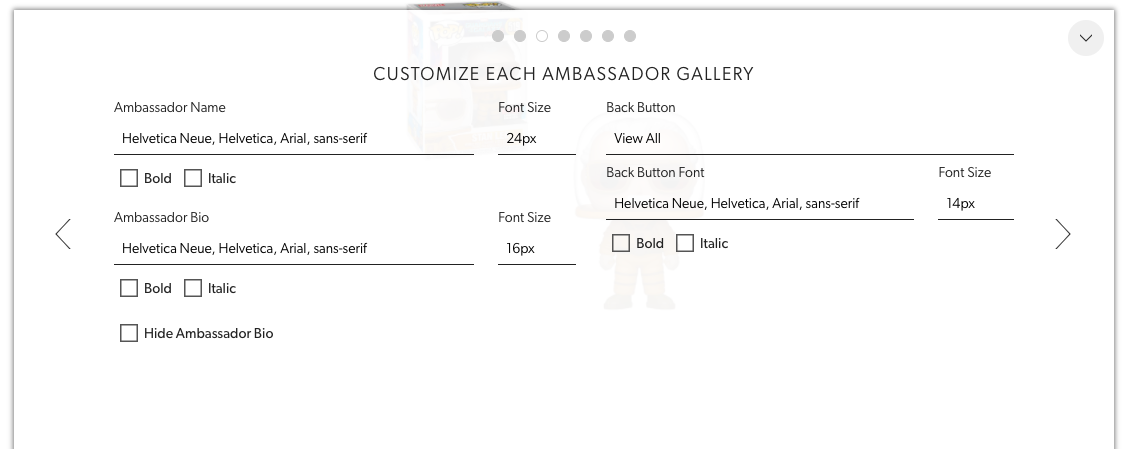
Step 4:
This series of options allows you to change the hover of the color and spacing: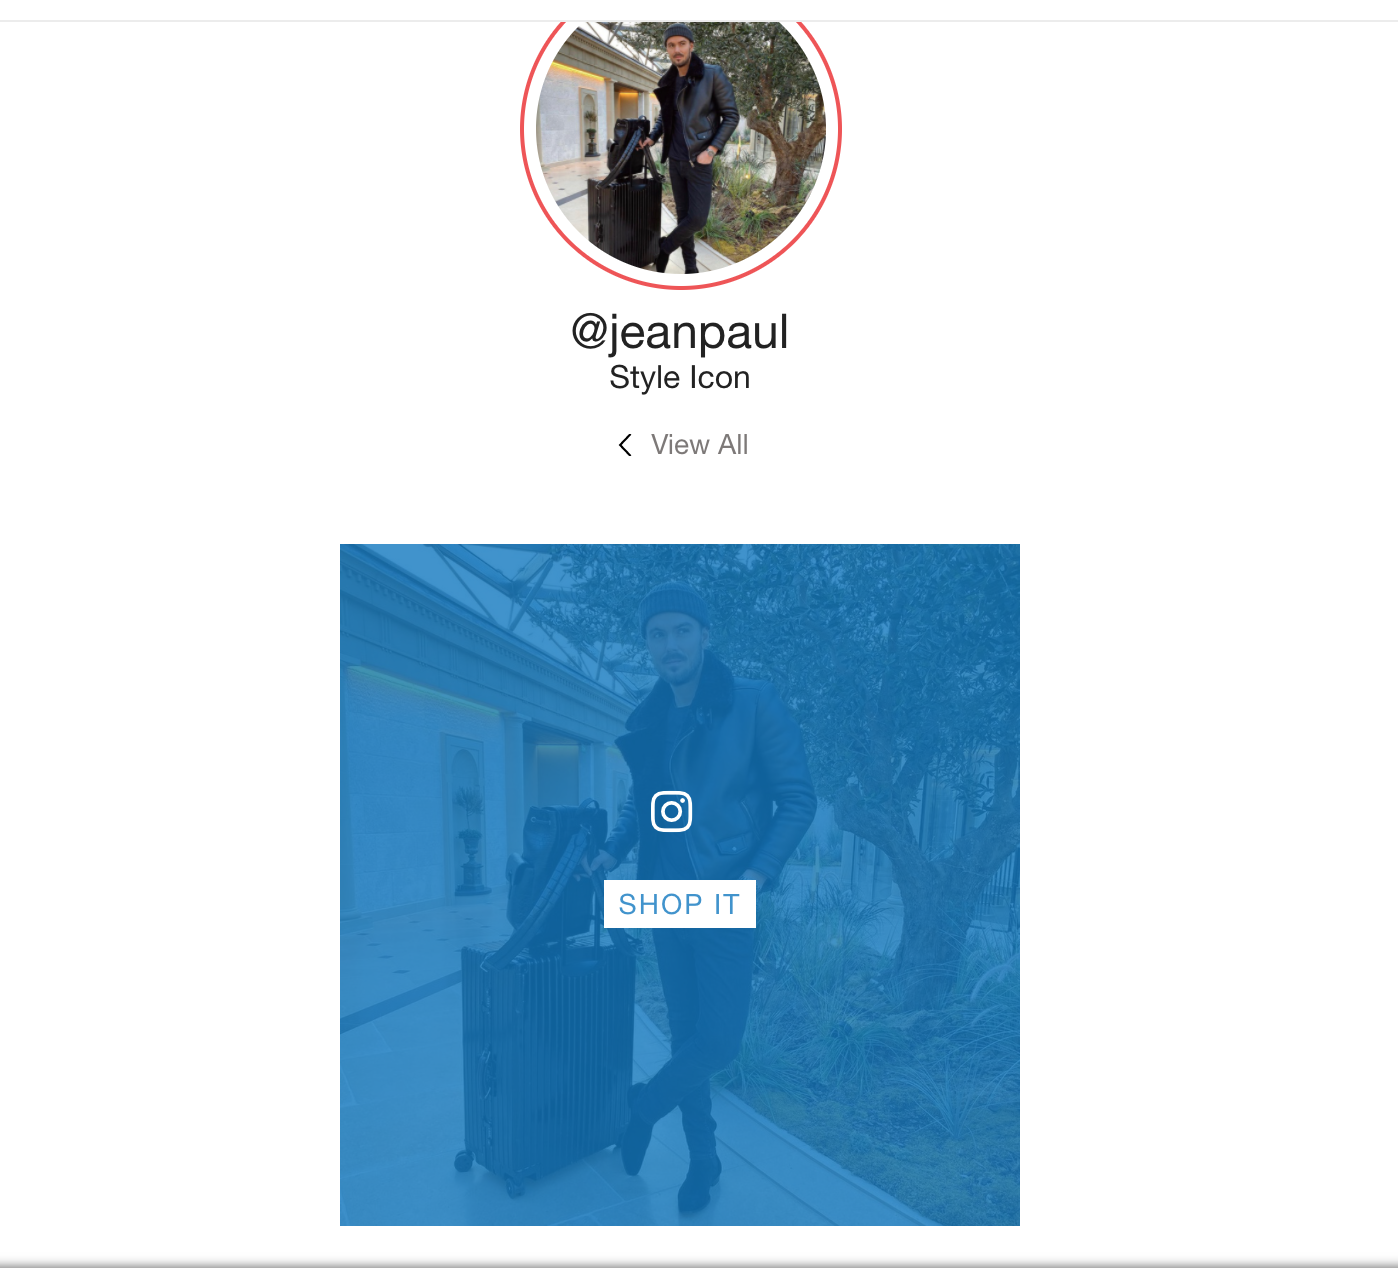
- Foreground: Edit the look of the button within the hover.
- Background: Edit the look of the background behind the button within the hover.
- Post Spacing: Edit the spacing between each post in the gallery.
- Hover Margin: Edit the size of the hover over the post.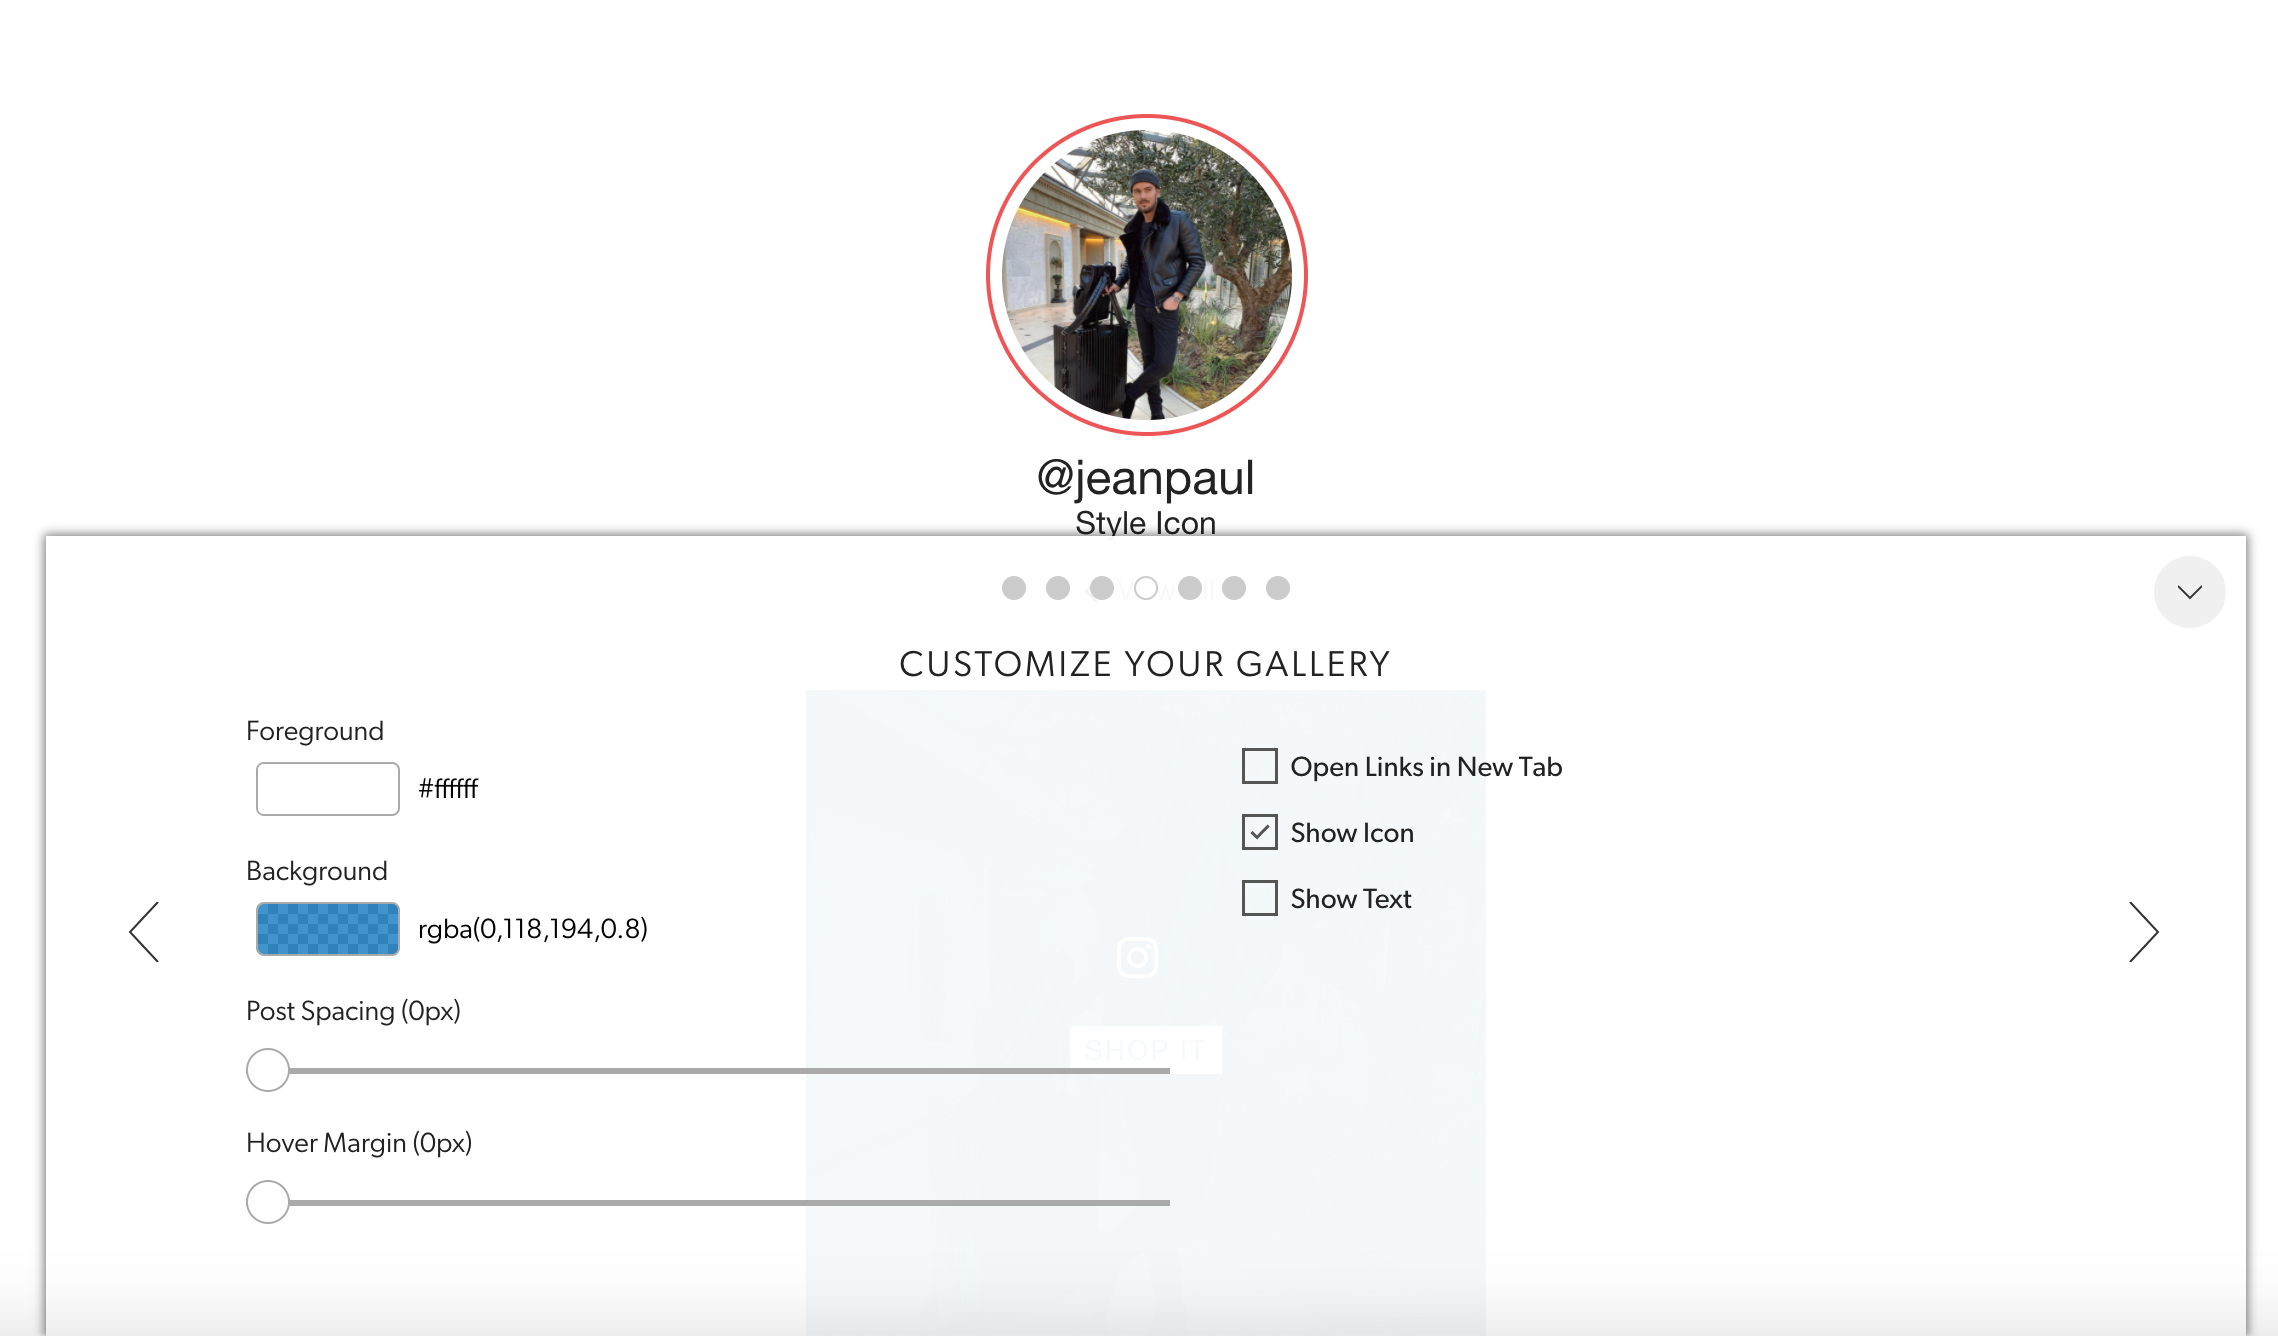
Step 5:
Customize the CTA (Call to Action) button: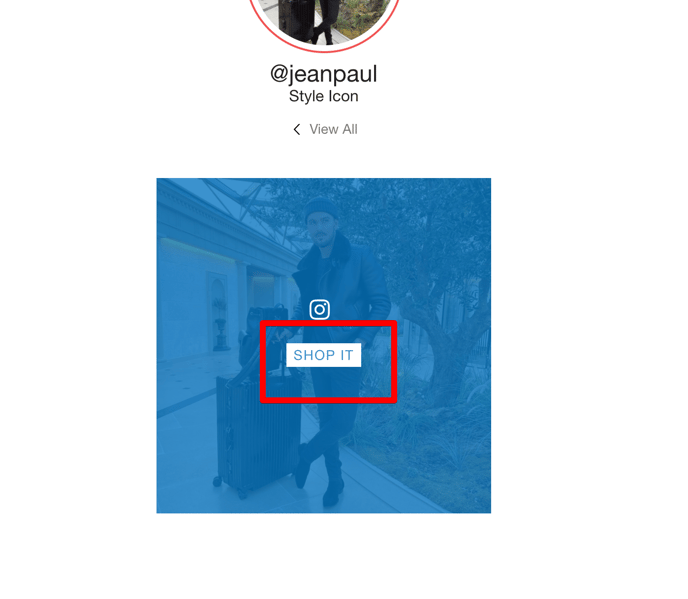
- Call to action: Edit the text of the CTA button.
- Button, Border, Underline, Just Text, None: These are your options on how you would like to button to show, feel free to click each one to evaluate which would look best.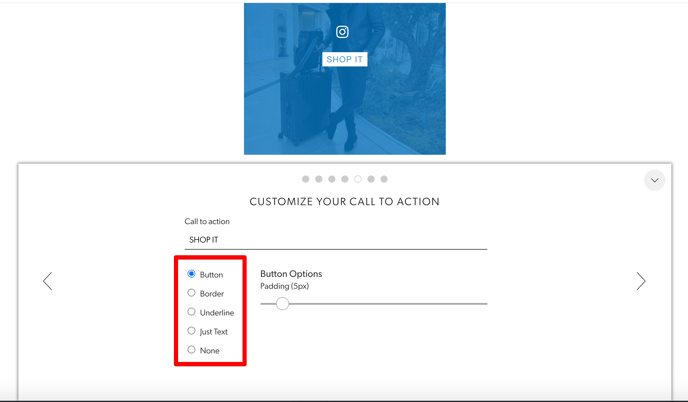
Step 6:
Edit the button font and size, as well as the comment in the pop up in this step:
- Comment Text: Edit the font and size of the comment text within the pop up.
- Accent Text: Edit the font and size for Ambassador Name, Call to Action, Date.
Step 7:
Lastly, you will want to copy the code that we provide you into the space you want the gallery to occupy: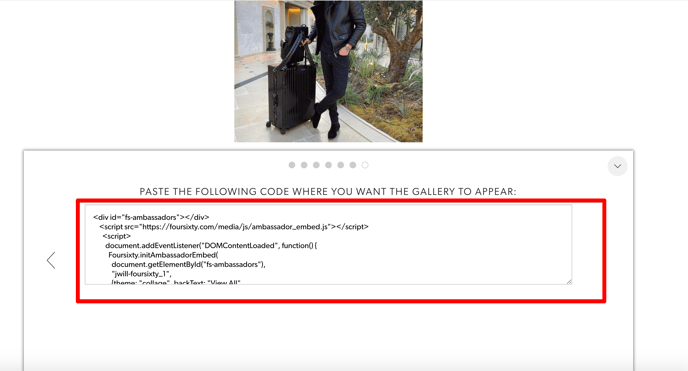
If you encounter any difficulties with this process or have any other questions, please reach out to us here!