Creating full page galleries in Shopify is a very easy process. Most of the work is done within the Foursixty Dashboard and then just copied over to Shopify!
Here's a step-by-step that can help you get your gallery going!
- Create your gallery code by running through the full page embed code tutorial first.
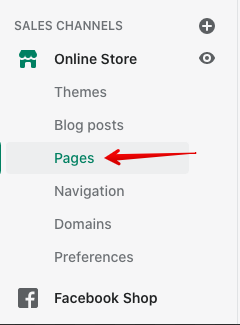
- Log into your Shopify store Admin and navigate to Online Store > Pages
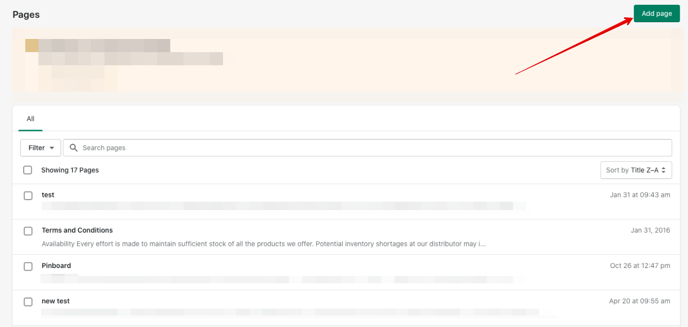
- Click the button to create a new page or you can open the page that you want the gallery to show on (if it is pre-existing)
- Click the small <> button at the right of the Content control (to open up the HTML source) and paste the code there that you created in the Foursixty embed tool and save the page.
Please Note: If the page is pre-existing and already has content, you will need to paste the code where you want the gallery to show up in relation to that content (bottom of the page, middle of the page, etc.) and then save the page.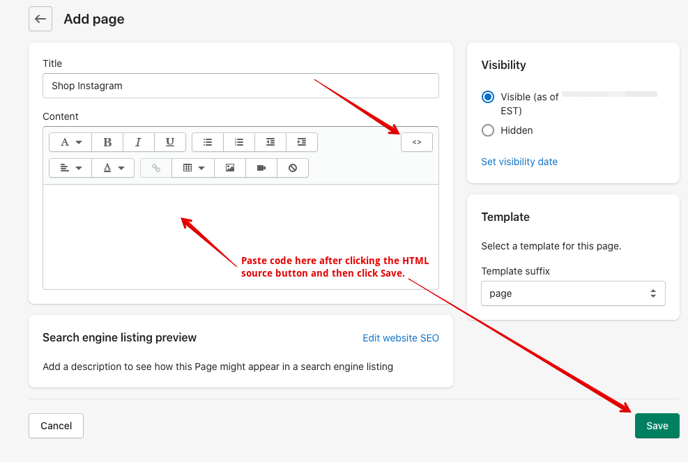
If the gallery does not fill the page, it is generally due to settings inside the template being applied to the page. This is controlled by the drop-down in the lower-right area of the Shopify page creator. If you have a "wide" or "full-width" option in the drop-down, then we recommend using that to widen the gallery's size on the page.
If you don't have this option, please let us know and we may be able to help by requesting access to your Shopify Admin.
Once you have added the source code to the page, the gallery will show when viewing the page. We generally recommend adding this to your Navigation Bar so your customers can easily find it. You can also use the URL of this page as a landing page for customers in social media and other marketing.