PLEASE NOTE: Dynamic Email Galleries are an exclusive feature of the Complete Plus plan. Complete plan users can still create static/manually created galleries using the guide available here.
Step 1:
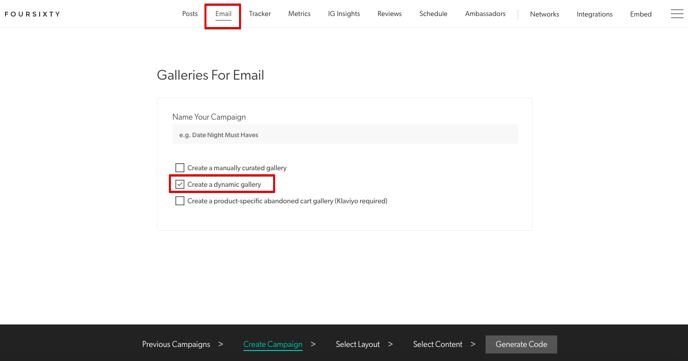
Click Email in the Foursixty navigation bar .
Then, select the Create a dynamic gallery checkbox.
Step 2:
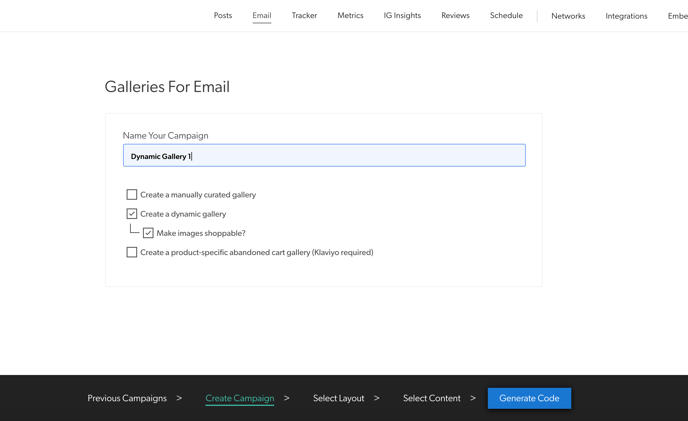
Decide if you would like to make the dynamic gallery shoppable or not.
We default to make it shoppable for your convenience:
Step 3:
Name your campaign (you must create a campaign name or the necessary code will not be generated).
Step 4:
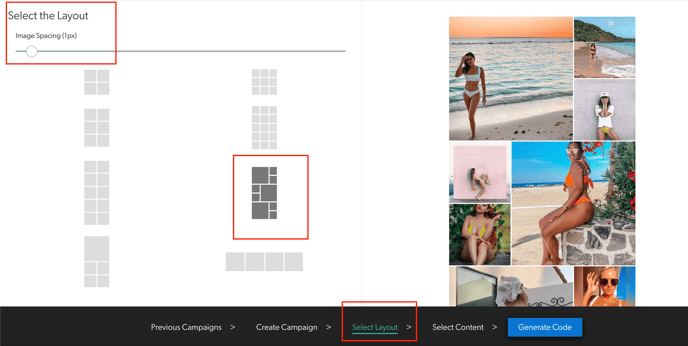
Click Select Layout and proceed to select your theme image spacing
Step 5:
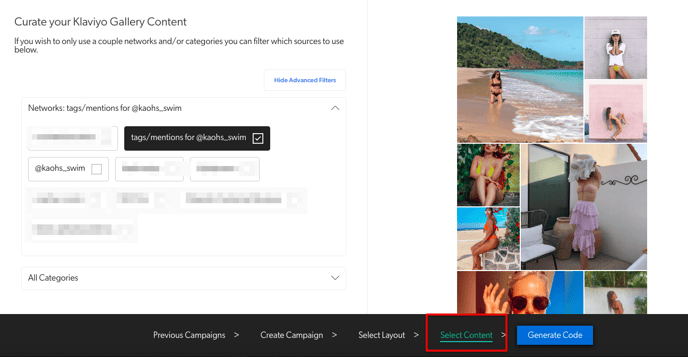
Once you are happy with the look, click Filter Content.
In this step you, choose the the content source(s) you want to populate your galleries. Some brands only want to show content from their IG account, while other brands want to show both their content and approved UGC. It's completely up to you, and this is where you can get granular with the content sources that comprise your galleries.
Further, you can even choose to only use content that you've assigned specific categories to.
NOTE:
If you don't make any content source selection, it will default to displaying all of your content sources.
Step 6:
Once you have selected your content sources, click Generate Code followed by Finalize Campaign.
Then, once the code is displayed, click Copy so that it copies to your clipboard.
From here you can paste it into your HTML block within your email campaign tool.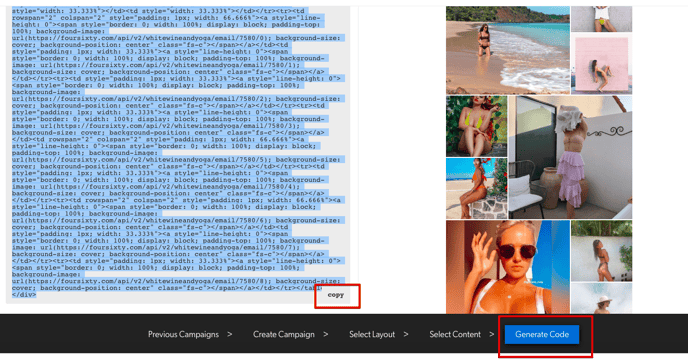
If you are using Klaviyo, here are some some helpful steps for integrating this code:
Step 7:
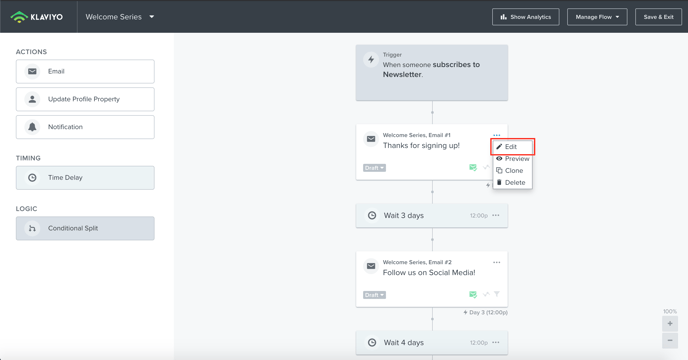
Once you have copied the code to your clipboard, proceed to open your Klaviyo account.
From there, open the email flow you wish to edit, the click Edit within your campaign's logic.
Click Edit Content once more.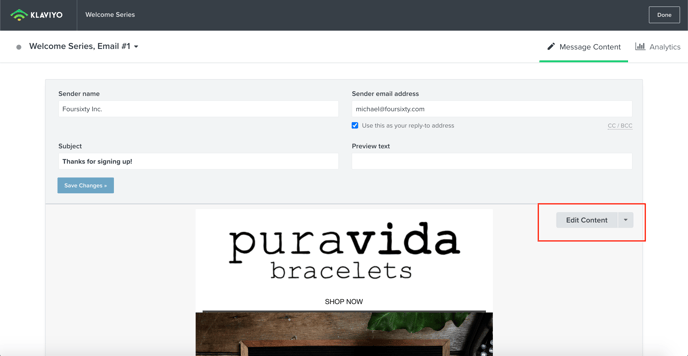
Step 8:
Once you are able to edit to content of the email, simply drag and drop the Text box where you'd like your gallery to be placed. Consider also adding some type of header above the gallery like "Styled On IG"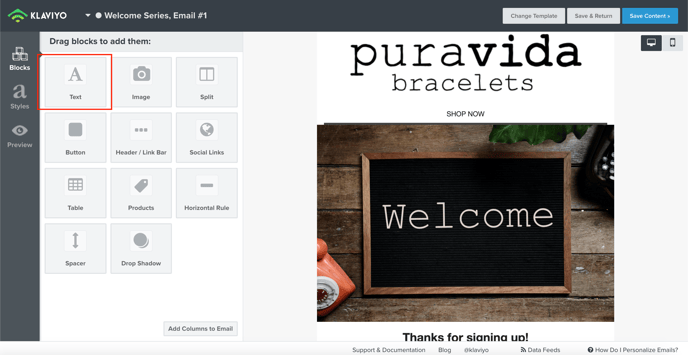
Once you're happy with the placement of the gallery, click Source within the text editor and proceed to paste the Foursixty email code into the source code area. Then click Save.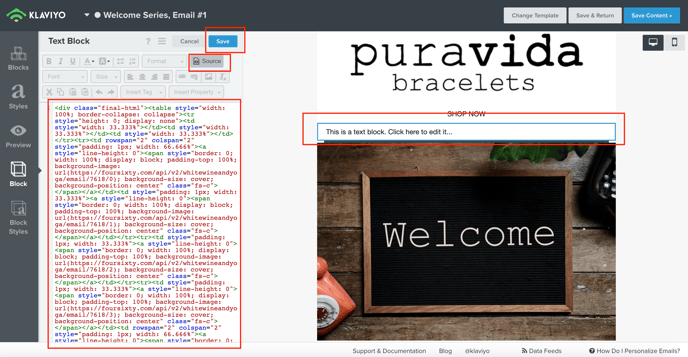
Step 9:
Once you have saved the code, it should show like this.
Then, please click Save Content in the top right hand corner of your screen.
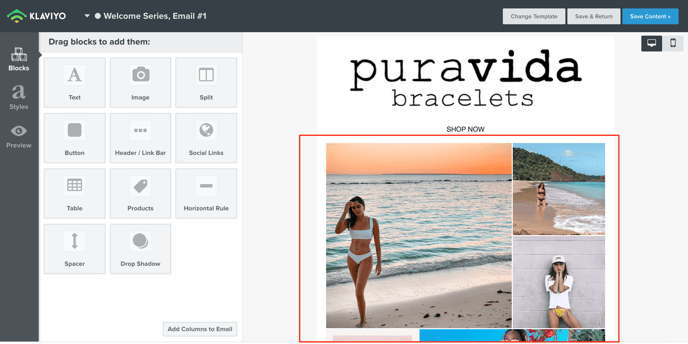
Step 10:
Here, you can preview what your gallery will look like within the email.
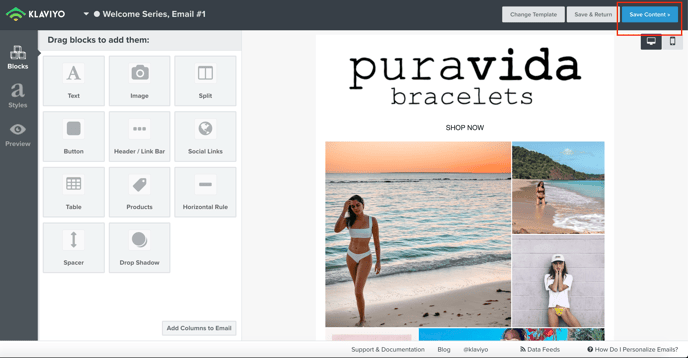
Once you are satisfied, click Done in the top right hand corner of your screen.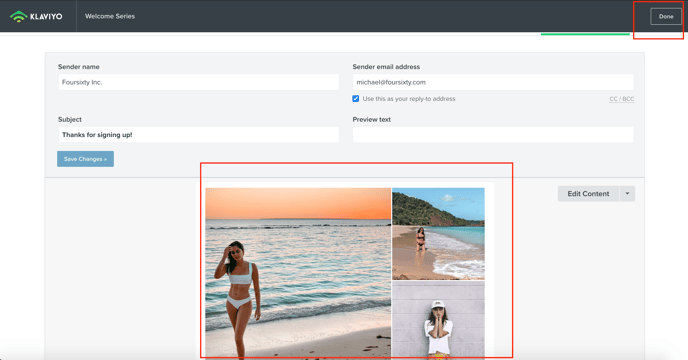
You have now completed the integration into your Klaviyo email campaign!
If you have any questions, please don't hesitate to reach out to our awesome support team at:
helpme@foursixty.com