You will learn how to tag/categorize ambassadors and influencers for your ambassador galleries.
We know you have a lot of great content from ambassadors and influencers, so we created a way for you to have galleries that focus on them.
In this article, you will learn how to categorize your ambassadors so you can set up and maintain the ambassador galleries.
Step 1:
First, you need to make sure that the ambassador posts are in the APPROVED section within your UGC area. If you need assistance on how to do this, click here.
Once the posts you want to use are in the APPROVED section, you will see the option to "Tag Ambassadors".
Click to add an ambassador: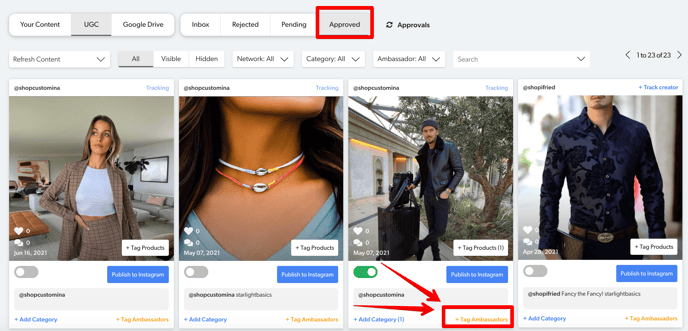
Step 2:
If you have never tagged this ambassador, you will type in the name and once you are happy with the name/label, click "Create...":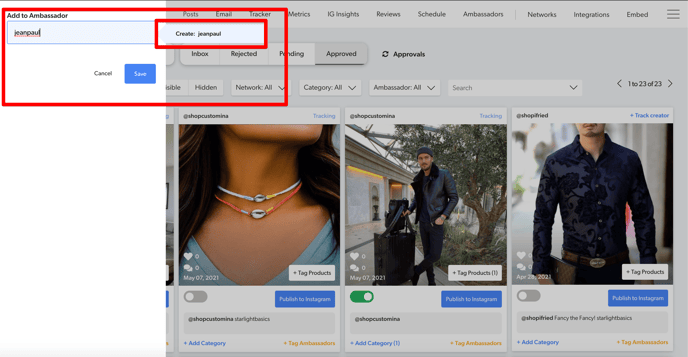
(If you have already made an ambassador tag with this name and you want to add them to the same category, simply select the name you already created, which will be below the "Create.." option.)
Step 3:
Once you click Create, please make sure it shows below the type box and then click Save: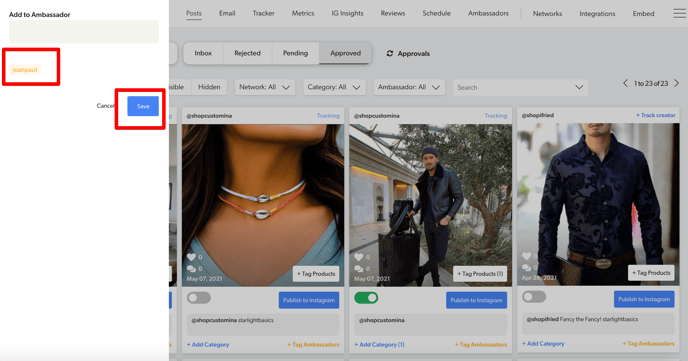
You will now see it updated in the APPROVED section: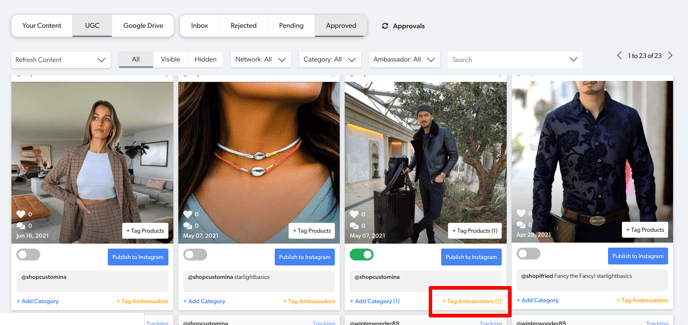
Step 4:
To confirm that your tag is complete, click AMBASSADORS in the top menu and you should see something like this: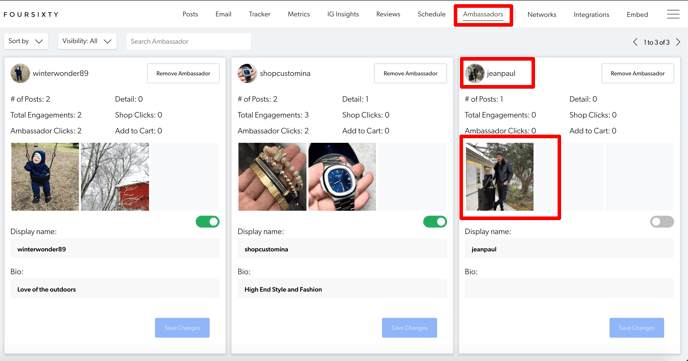
Step 5:
If you wish to add/edit the Bio, simply type what information you would like to provide on the Ambassador gallery page and then click "Save Changes":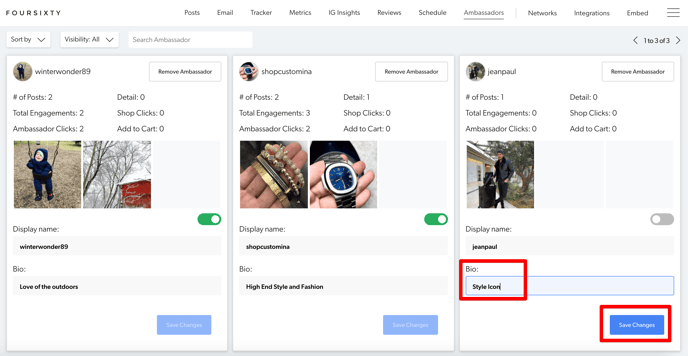
Step 6:
Lastly, to make sure your ambassador is LIVE within your gallery/galleries, simply click here to make them visible (when you hover over it, it will show Visible):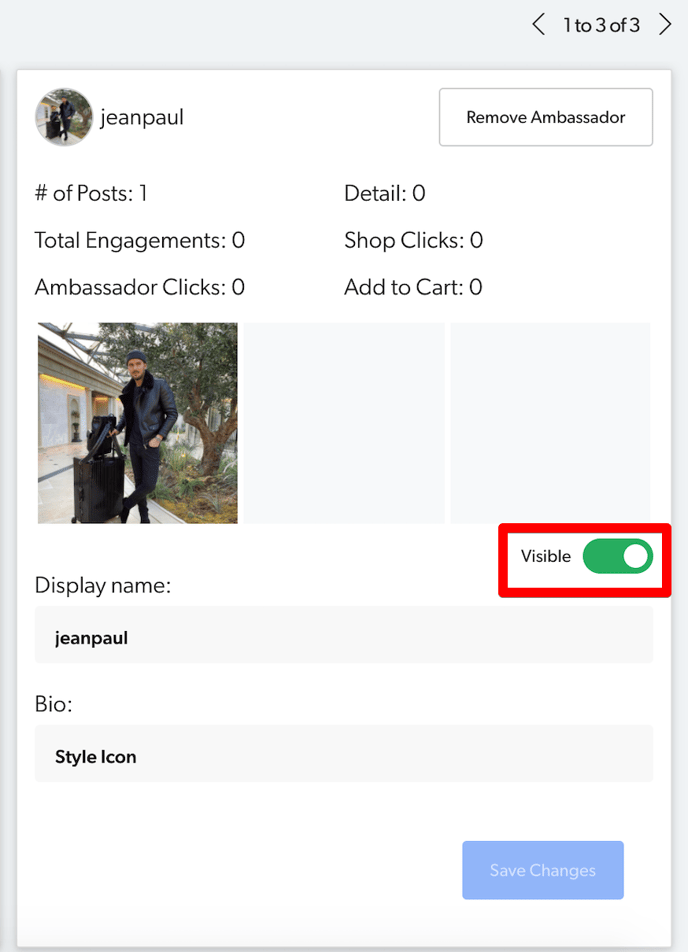
Congrats! You have now created an ambassador for your Ambassador Gallery/Galleries!
If you encounter any difficulties with this process or have any other questions, please reach out to us here!
